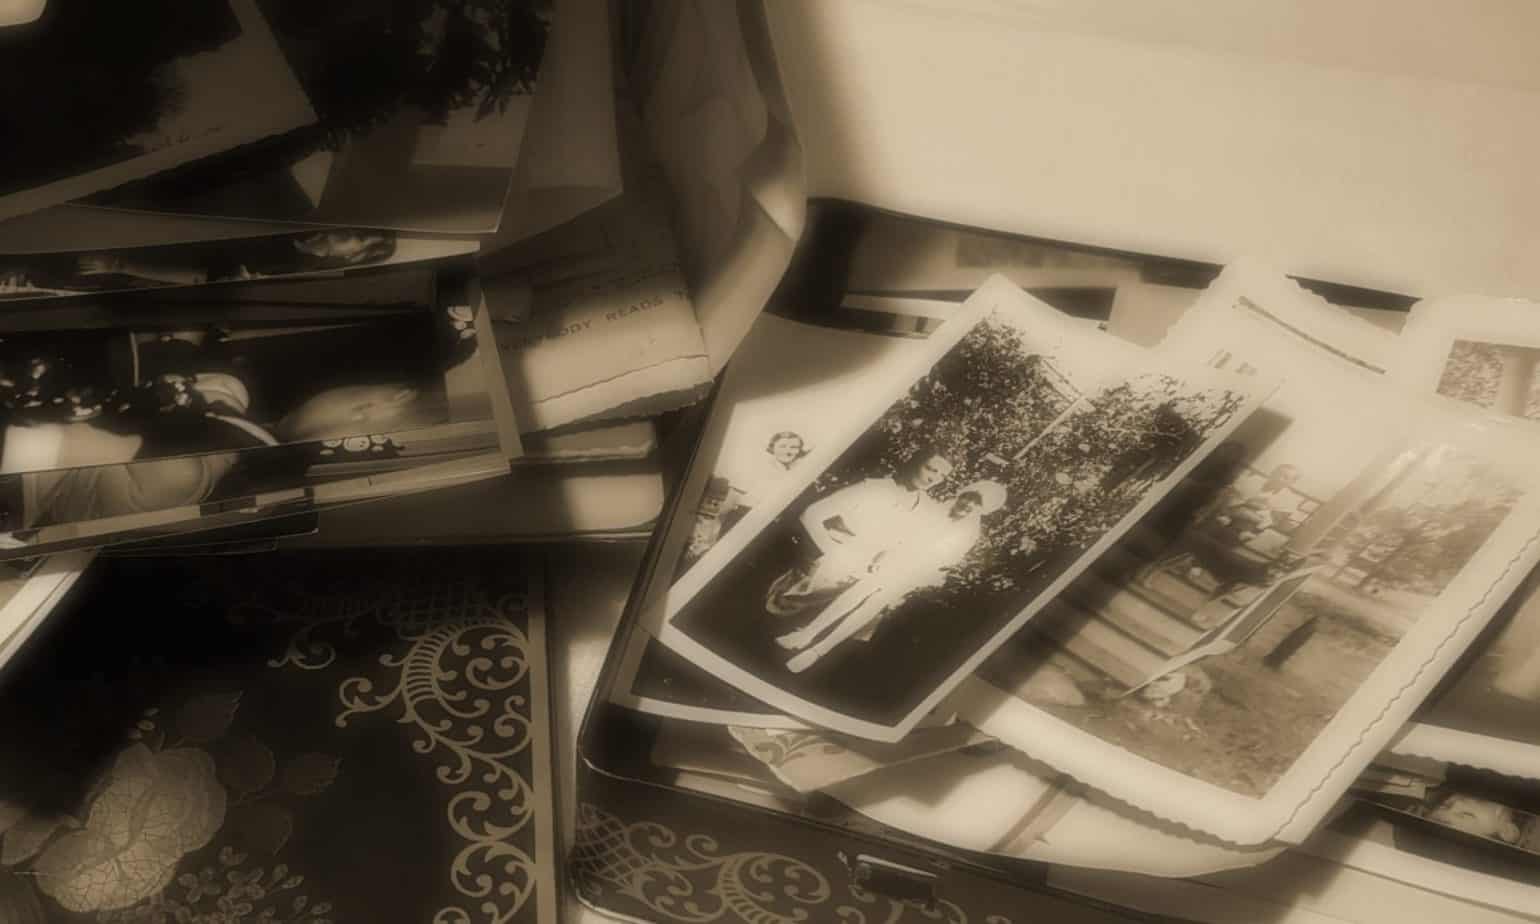
“When our house flooded, it wasn’t losing the TV or furniture that bothered us most, it was the memories. We captured our memories in photos and although our thoughts could conjure up moments that were special, losing the physical picture was beyond traumatic to us.” Martha K., resident of High River, AB (June 2013)
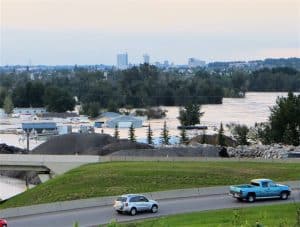
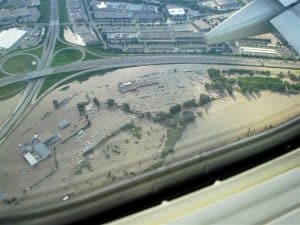
Floods, tornadoes, hurricanes, and wildfires seem to be occurring with greater frequency in recent years, and often our priceless photos and albums are the victims of these events. Or, our photos are damaged by more mundane events such as leaky pipes, burst hot water heaters, and sewer backups. When these events occur, you need help and information right away.
This post provides tips for what to do when disaster strikes, so you can reduce damage and increase the chances of salvaging your photos and albums. If you suddenly find yourself faced with wet, damaged photos and albums, here’s what you need to know to reduce damage to your photos and recover your precious images once the emergency is over.
First, it’s important to know what NOT to do:
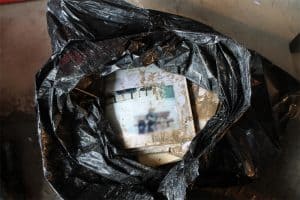
- Don’t throw away your wet, muddy or damaged photos or albums!
- Don’t dry photos in their albums, in envelopes, or stacked together.
- Don’t dry photos in a place with bright sunlight, wind, or dust.
- Don’t dry wet photos without rinsing off mud and debris.
- Don’t rub the photo surface with your fingers or a cloth.
- Don’t pry wet or dry photos apart.
- Don’t use cleaning solvents of any kind on photos.
- Don’t use heat sources to dry photos (hairdryer, oven, microwave, etc.)
- Don’t dry photos on printed newspapers or similar materials.
What to do first:
- Wear gloves and a mask when handling wet photos and albums – particularly in cases of natural disasters or sewage back up.
- Remove wet envelops, folders, album covers and dispose of them. Take a picture of the album cover or envelops if there is information about the contents on it.
- Remove plastic covers and sleeves from photos where possible.
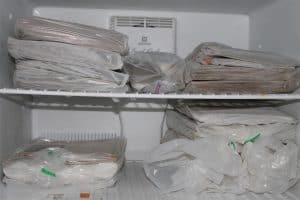
- Put your wet photos and albums in plastic bags and freeze them. If possible, layer wax paper between individual photos or between album pages.
- If you don’t have access to a freezer, put photos and albums in sealed plastic bags to try and keep them from drying out completely. These must be cleaned within 48 hours, as mold will begin to grow.
- Focus first on the photos that you know have no digital backup or negatives.
- Focus on the photos with the least amount of damage first.
- If you have very old heritage photos, you may want to contact a professional photo restoration service. A Certified Photo Organizer can assist you in finding one.
- Members of the Association of Personal Photo Organizers can help you with recovering your photos. Locate one in your area here: The Photo Managers.
How to clean your photos: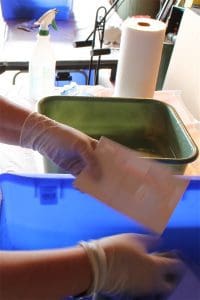
- Gather the supplies and materials
- Take safety precautions.
- Plan the order of cleaning and drying your photos: wet first, then frozen, then dry. Framed photos first, then prints with no negatives or damaged negatives, negatives, then all other prints.
- Thaw frozen photos in small batches at room temperature out of plastic bags.
- Scan or photograph photos that are stuck to glass or album pages, or that have significant damage BEFORE you clean them.
- Remove photos from albums or glass frames – this may require soaking in clean water.
- If photos are stuck together, soak in water until they can be separated.
- Test your cleaning process on a few, less important photos first – do this for each kind of printed photo
- Rinse photos one at a time in clean, room temperature tap water. Gently rub any stuck dirt or debris with a soft brush, or swish in water if the emulsion is damaged.
- Once dirt and debris are removed, swish the photo in clean, room temperature distilled water.
- Change the water frequently.
- Shake off excess water, and lay prints flat on layers of clean newsprint to dry. Photos can also be hung by a corner with a plastic clip to dry.
- Wait until prints are completely dry before stacking them.
- Once dry, flatten under heavy books.
- Scan the dry photos to create a digital back up copy.
Cleaning Smoke Damaged Photos
- Set aside a clean, dry work area with good ventilation.
- Remove as much soot from your item as possible. If there is extensive loose ash and soot on your item, use a vacuum cleaner and a soft, clean brush to gently brush dirt towards the vacuum nozzle. Turn the vacuum cleaner onto the lowest setting and attach a fine gauze or a piece of stocking over the nozzle to create a filter. This will prevent suction of your item into the vacuum. A vacuum fitted with a HEPA filter is recommended so that the dirt is not released back into the room. Do not place the nozzle directly on or too close to the item. Handle items gently as they may be brittle.
- If there is a layer of dirt and soot on your items, you can use these products to remove the soot: a smoke sponge, (available at Amazon) or dry-cleaning sponge, made from vulcanised rubber — use without water and gently work over the surface to collect the soot
- A kneadable eraser (available from art stores) can be used to remove soot by gently rolling it over the paper
- A clean dry cosmetic sponge can be used in a similar way to the dry-cleaning sponge — these sponges can be washed, dried and re-used.
Frequently Asked Questions
What does freezing the photos do?
If you don’t have time to deal with your photos and albums immediately, freezing them halts the biggest threat to the destruction of photos – mold. Freezing doesn’t kill the mold, but it stops it from progressing. When you thaw out the photos to clean, the mold will start to grow again, so thaw your photos in manageable batches, not all at once.
Can I keep photos I have cleaned and dried?
It depends. There is no way to kill the mold on photos. It will dry and particles may stay on your photos. Placed in another situation with moisture (e.g. a humid house), the mold may grow again. I recommend that you scan the cleaned photos and dispose of the prints.
If I follow these steps, will I be able to save all my photos?
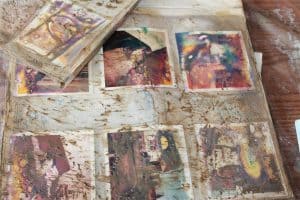
These tips are your best chance to salvage your photos and albums, but there are no guarantees. Some photos and albums survive floods with surprisingly little damage, some may be completely destroyed, and others will be somewhere in between. In addition, some types of photos are more easily damaged by water than others; Inkjet prints, for example, usually do not survive any time submerged in water. Fortunately, however, Inkjet prints have usually been printed from digital files, and can hopefully be recovered from the original file.
Resources and References
For detailed information on the cleaning process, please consult the following reference documents:
Preservation Matters: Disasters – Saving Web Photographs – National Park Service
Helping Photos Weather the Storm – Pixologie
A Consumer Guide for the Recovery of Water-Damaged Traditional and Digital Prints – Image Permanence Institute
Photo Rescue Project – FujiFilm
Collection Emergencies – Library of Congress
What to do with Moldy Tapes?!– Aperture, A Kodak Digitizing Blog
More information on saving damaged photos can be found on Calgary Photo Solutions Pinterest Board
Appendices
Safety Precautions:
- Wear gloves – rubber gloves for handling bags and containers of wet photos, taking albums apart, etc.; and surgical gloves for cleaning.
- Protect your clothing.
- Wear a mask.
- Wear goggles.
- Work in a well-ventilated area away from children and pets.
Materials and Supplies:
- Work tables
- Gloves (latex or nitrile), rubber gloves, cotton gloves
- Respiratory masks
- Tyvek® suit or old clothing
- Safety goggles
- Plastic bins
- Freezer bags, plastic bags, and garbage bags
- Wax paper
- Scissors, utility knife, pliers
- Soft brushes
- Microfiber cloths
- Cotton swabs, cotton balls
- Spatula (plastic or rubber)
- Distilled water
- Drying tables or hanging racks
- Plastic clothes pins or plastic-coated clips
- Clothes lines
- Blotting paper, clean newsprint, plain paper towels
- Masking tape, note paper, paper clips (plastic)
- Permanent ink markers (such as sharpies), pencils
- Empty photo boxes or shoeboxes
- Negative envelopes
- Scanner
- Camera
- Glass or Plexiglas
- Heavy books

Kathy Stone is the founder and owner of Calgary Photo Solutions. In 2013 she helped families recover several thousand photos damaged in severe flooding in Southern Alberta.
If you need help or further information, Contact us
© Calgary Photo Solutions, 2024
Fabulous article!
Thanks Regina.
Wonderful tips!!
Great article! Thank you so much for sharing.
This is a wonderful resource. I refer back to this post regularly. Thanks once again for sharing your hard earned wisdom with everyone!
Wow – what a wealth of information! What a valuable service you provide to your clients!
Thanks Janet. I want to share this information far and wide, as I have heard so many stories of people who threw away wet or dirty photos after a disaster, thinking they were lost. And most often, after family and pets, photos are mentioned as one of the things people fear losing the most.
Great article filled with plenty of tips and knowledge. Pictures carry so much meaning, and the information you provided in your post will help many people restore their memories!
Thanks Shannon – I hope we can share the word so that people don’t throw away photos after a disaster – it happens all too often.
Thanks Andi Willis!
You are an expert on this topic. So grateful for you sharing your knowledge.
Thanks Lisa – I know you have been through this too.
UPDATE: To find a Professional Photo Manager to help you, click here https://thephotomanagers.ontralink.com/t?orid=557&opid=43
Kathy, you never cease to amaze me. This article is so well organized. You have always been a fabulous source for information. Thank you for sharing with us all. I can only hope and pray I don’t ever get hit with this kind of disaster.
Thanks so much Peggy. I am happy to help people facing this kind of disaster. Photos are our most important possession.